Showing posts with label DIY. Show all posts

08 December 2010

DIY: Holiday Tree


Raise your hand if you have a little home.
(raised)
Raise your hand if you're are not too fond of cut trees.
(raised)
Raise your hand if you just like making stuff.
(raised)
Raise your hand if you just want to save some moo-lah.
(raised)

Make your own (insert holiday you celebrate) tree/cutout!

What you will need:
  • cardboard (as long or as small as you would like)
  • scissors
  • exacto knife
  • metal ruler
  • fabric/wrapping paper colors of your choice (as long or as short as your "branches")
  • adhesive (I used fabric glue but I imagine mounting tape would work just as fine)
  • measuring tape
  • black marker
  • cutting mat (if you don't have one you can just use a piece of cardboard ;)
STEP 1: Find that special wall in your house and measure the height and width you would like your tree to be. My tree is about 3 feet high and its longest branch is 18 inches. Once you've decided draw a line the length of your tree like so

STEP 2: Make the branches. You could do a more realistic branch if you want and you can have as many branches as you like but I wanted to go more abstract and make it look more like panels and opted for less branches. For my tree, I made six branches so I started by making the bottom branch the longest and then worked my way up decreasing each branch by a few inches.
Till I got this rough format.

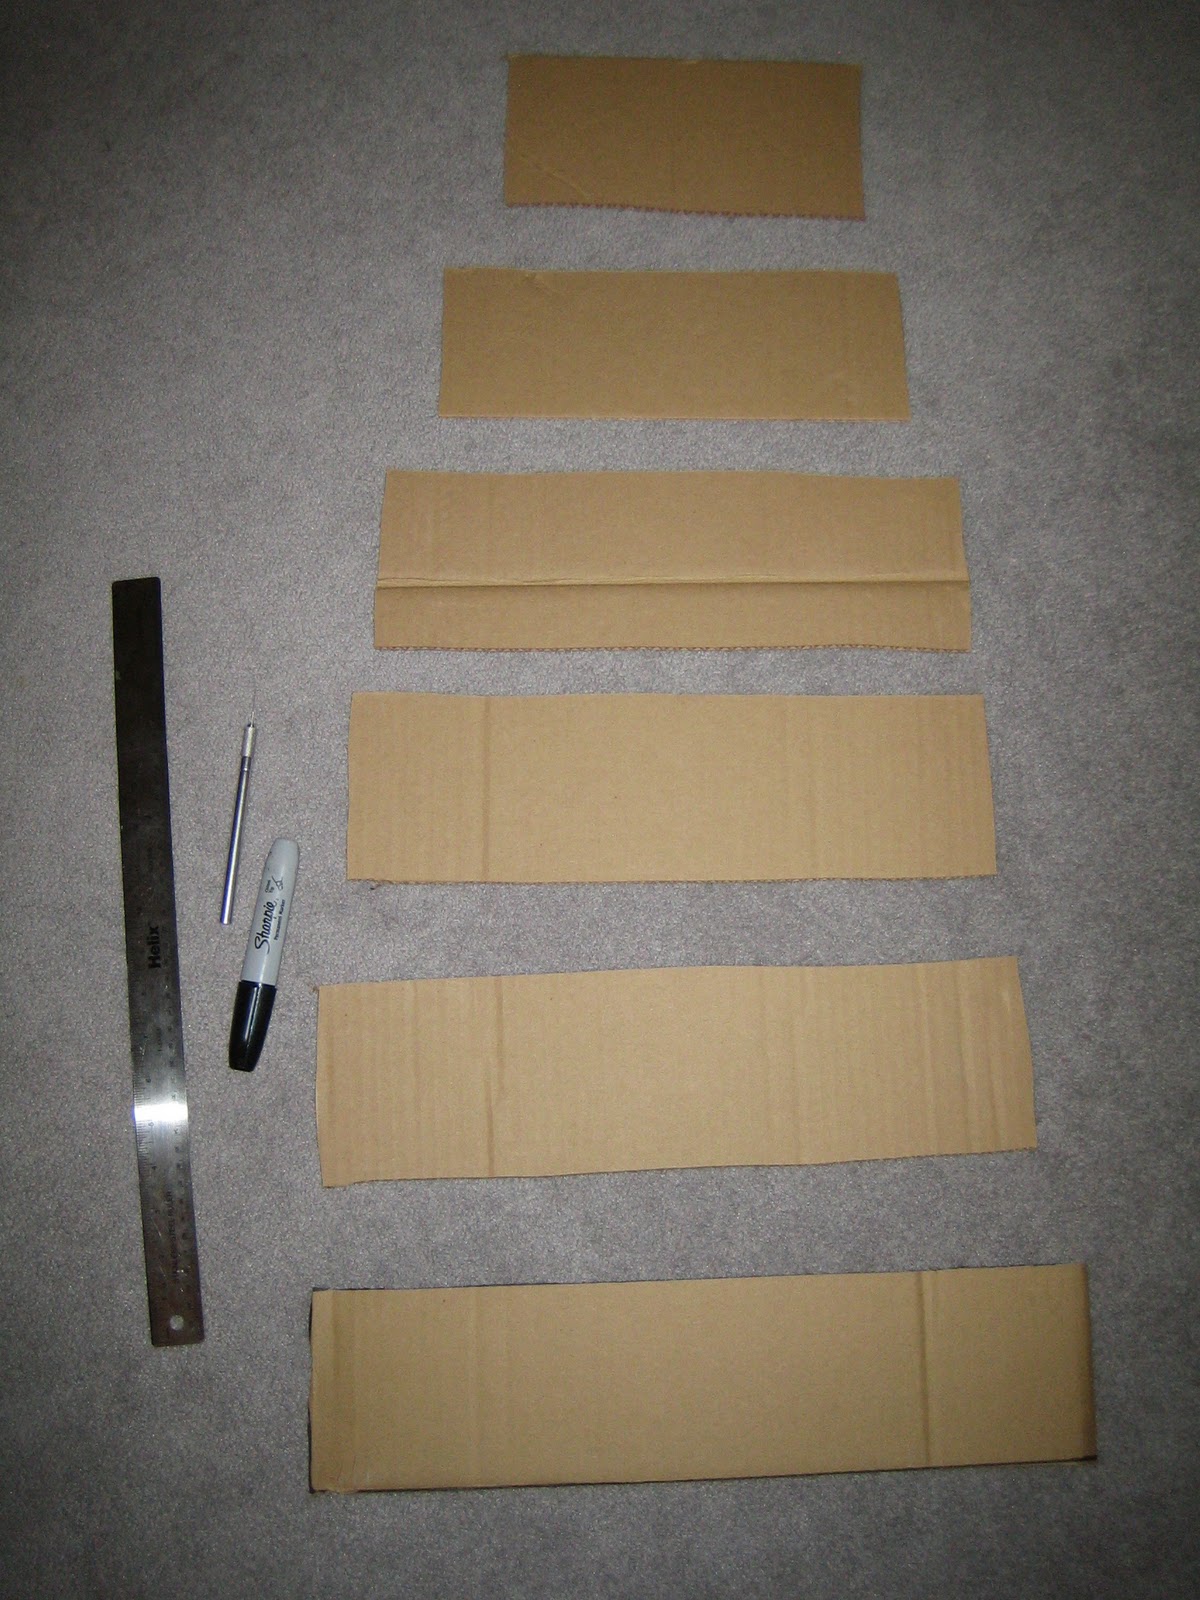
STEP 3: Refining. As you can see from the above picture, some of my branches came out being the same size and not as straight as I would have hoped. This is where the exacto knife and metal ruler come in handy!
Make some lines and make those branches mighty fine!
STEP 4: Apply your fabric or wrapping paper. Cut appropriate pieces of your fabric for each branch and adhere to cardboard. I left an inch around each side so the edges would be clean.
STEP 5: Your trunk! When I was done with my branches...I decided it needed a trunk so I cut out a little piece and applied a complimentary fabric like so

STEP 6: Hanging your tree! I had some 3M stickies lying around so I decided to use them. The great thing about this product is its damage free nature...which is muy bien when you are renting an apartment! All you do is peel, stick, and apply to that special wall!! I also decided to give it a bow as a topper...now my tree matches my headbands!

And VOILA. In less than a half hour you have a super cute holiday tree that you made!!! And who knows...maybe your cardboard was a pine tree once upon a long winter ago :)
Happy Holidays!! BE GOOD.Love, Jonnie

09 December 2009

DIY: handy-crafty-stellar Art Portfolios


This would be one of the portfolios I made for the transportation of my color/light and theory pieces. It's made out of cardboard and packing tape, and held together by a rubber band...stamped and everything.


the stamps..


opposing flaps to keep it as sleek/flat as possible.


I know, brilliant, what can I say, I am amazing...

What you will need:
  • 2--11" by 14" cardboard pieces (or however large you would like your portfolio to be.
  • a piece for the inside flap
  • packing tape!
Step 1: If you need to cut your pieces down to size, do so. If not, tape the two uniform pieces together leaving a half inch margin between them (this will allow the portfolio to fold easily). Make sure you wrap the tape completely around it so the tape is sticky part to sticky part. This will make it so your work isn't getting torn up by the tape binding.

Step 2: Tape in flaps tightly against the inside panels. I did opposing sides to my work would lie flatter.

Step 3: Decorate if you want! I made a stamp out of gum eraser and stamped some thimbles on mine :)

02 January 2009

DIY: The Ribbon Monster


I found a link through saraH about making ribbon holders...so I made myself one.

you can make one too with an oatmeal or coffee can!

You will need:
  • an oatmeal tin or coffee tin (the 130z size)
  • an exacto knife
  • a pencil that is unsharpened
  • india ink or whatever medium you would like to decorate in
  • RIBBONS
Step 1: Cut a rectangle in your coffee tin. Probably no wider than a 1/4 of an inch...however, the smaller it is (speaking of its height) the better it will hold ribbons.

Step 2: Decorate! I used india ink and drew some swirly, paisley looking eyes.

Step 3: Put ribbons on unsharpened pencils (by the spool) and drop into tin. Put on cap and VOILA.

LinkWithin

Related Posts Plugin for WordPress, Blogger...